
 FREE Delivery. Order today, Get it by Friday 01st August
Description
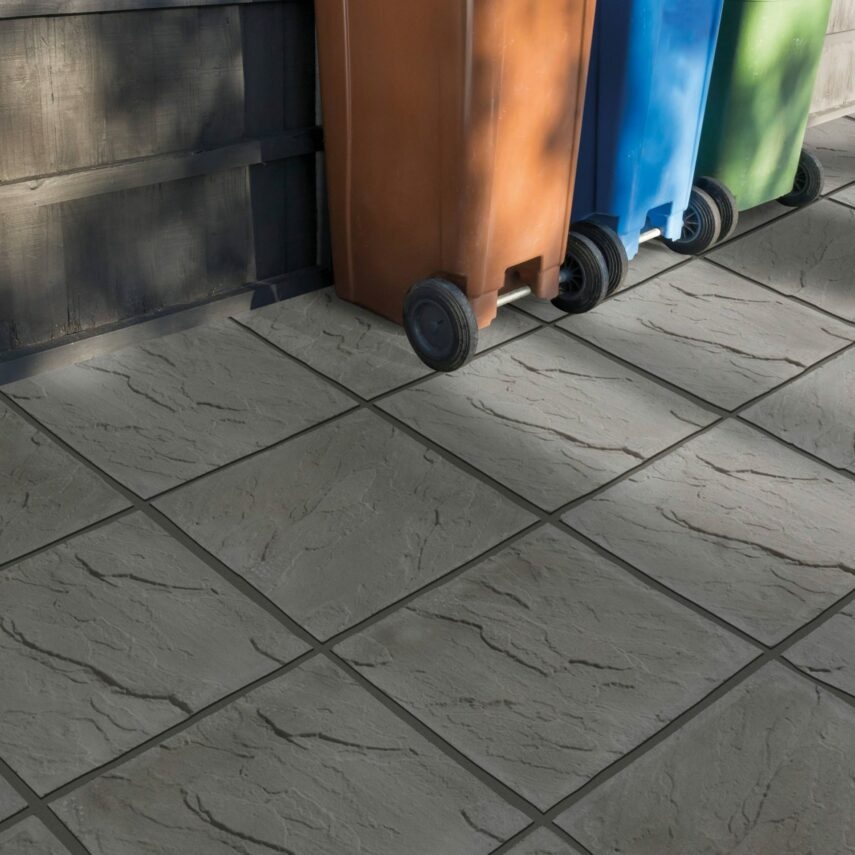
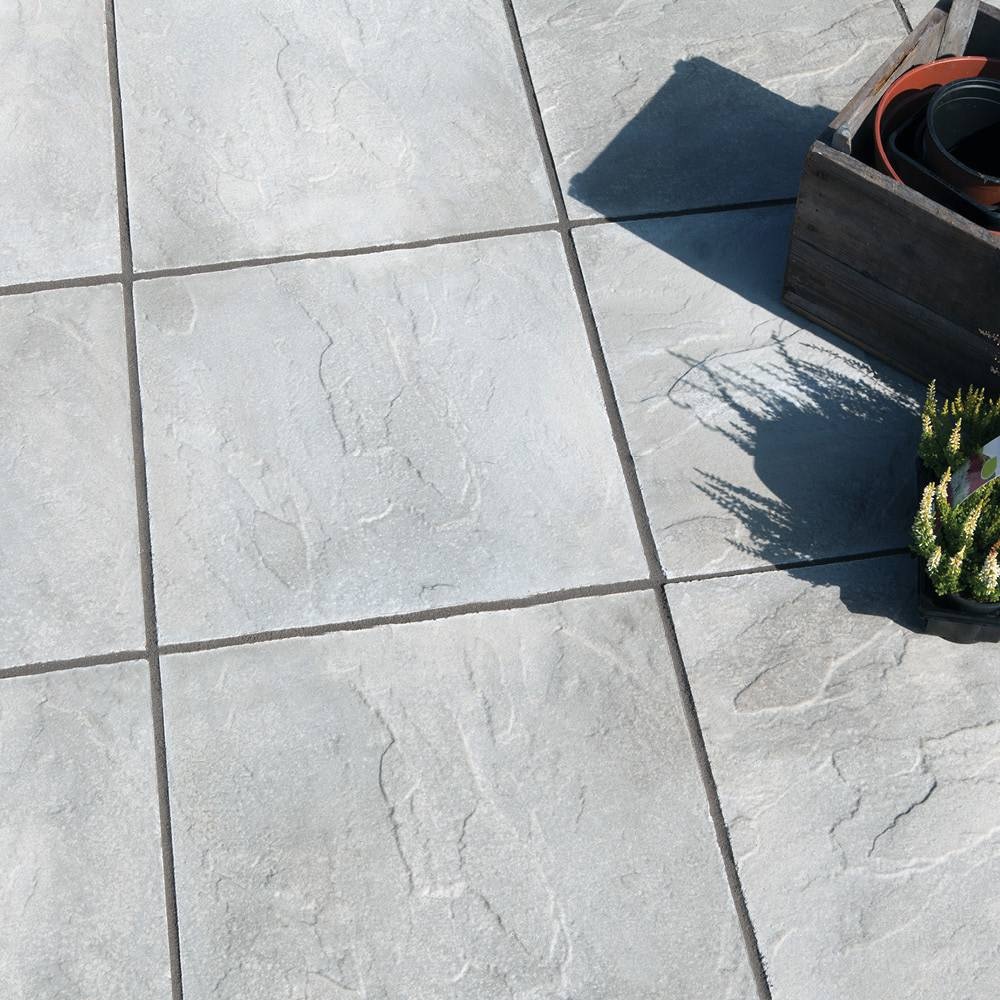
Homepave Light Grey Riven Concrete 450×450 Paving Slabs
Size Options
450x450mm | 600x600mm
Specifications
Colour: Light Grey
Type: Riven Concrete
Thickness: 35mm
Pack Coverage: Full Pack 11.36m² (56 Slabs) / 5.67m² Split Pack (28 Slabs)
Introducing Homepave Light Grey Riven Concrete 450×450 Paving Slabs
A highly practical and reliable choice for your outdoor space. These paving slabs are designed with both functionality and durability in mind. The slabs feature a soft, light grey color, offering a clean, neutral tone that blends seamlessly with a variety of outdoor environments. The subtle hue enhances the natural beauty of your space without overpowering it. Making it a versatile option for a range of outdoor projects.
The riven texture of each slab adds an organic, natural finish that not only looks great but also offers a practical benefit: a slip-resistant surface ideal for areas with high foot traffic. Moreover, this texture ensures safety in all weather conditions, further enhancing the functionality of the slabs. As a result, these paving slabs make an excellent choice for utility areas such as walkways, driveways, and service paths
Made from robust, high-quality concrete, these paving slabs withstand the harshest elements, from heavy rain and snow to the intense heat of summer. The strong concrete construction ensures long-lasting performance, making them an excellent investment for both residential and commercial outdoor spaces. Designed to endure heavy use, these slabs maintain their structural integrity and aesthetic appeal over time, even in the most demanding conditions.
Though primarily intended for functional spaces, these paving slabs offer exceptional durability and value, providing a reliable foundation for outdoor areas where practicality takes precedence over decorative appeal. Whether you’re creating a driveway, garden path, or utility zone, these paving slabs offer the perfect balance of strength, reliability, and long-term performance.
KEY FEATURES
- Light Grey Colour: A neutral tone that blends well with various outdoor settings.
- Riven Texture: Provides a natural, non-slip surface ideal for functional spaces.
- Durable Concrete Construction: Built to withstand the elements and ensure long-lasting performance.
- Practical for Utility Areas: Perfect for outdoor areas where function takes priority over decoration.
Ordering Tips (+10% Rule)
Nationwide Delivery Available – Shipping costs may vary.
We always recommend following the 10% rule of ordering an additional 10% of paving to account for any offcuts and breakages that may happen in transit or throughout the installation. In most cases the chipped or damaged tiles are not totally unusable as they can be used for cuts throughout the project.